MR Brain Perfusion
Step 1:
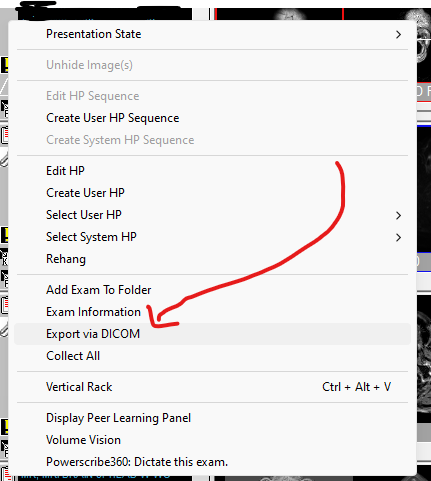
1. Right click on the gray bar all the way to the left in PACS
2. Click export via DICOM
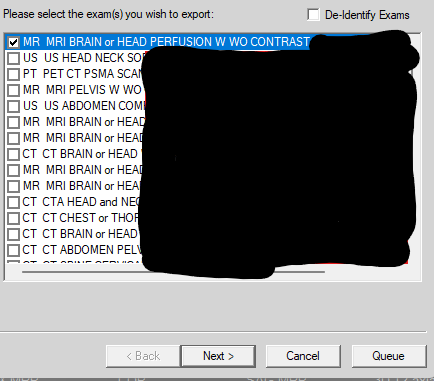
3. When the pop-up comes up, make sure your study is selected (it should have the date all the way to the left of the line and should read MR perfusion) - it is typically the study at the very top —> then click next at the bottom
Every other study that they have had in the past will show up below it and should be unselected
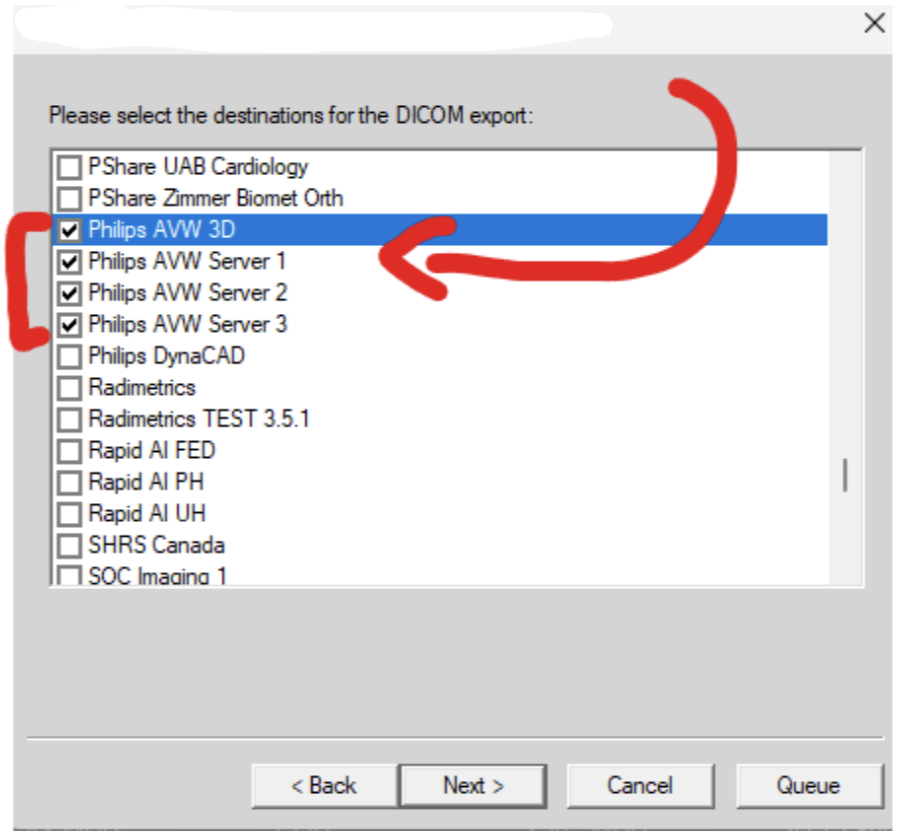
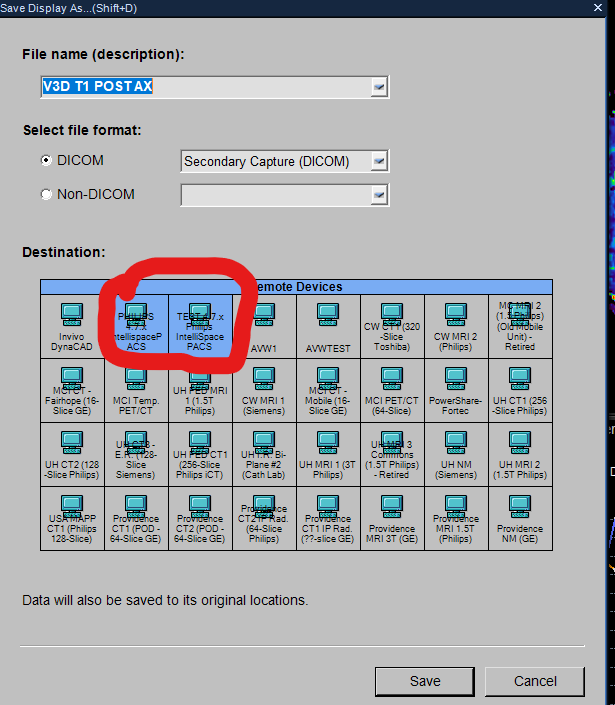
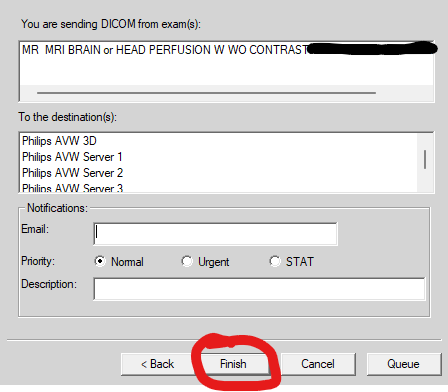
4. Then on the next screen, scroll about ¾ of the way down until you see the Philips AVW listed (I am not sure which is the correct single one so I have selected all 4 that start with Philips AVW as shown in the picture below) —> then click next
5. On the next scree now click finish
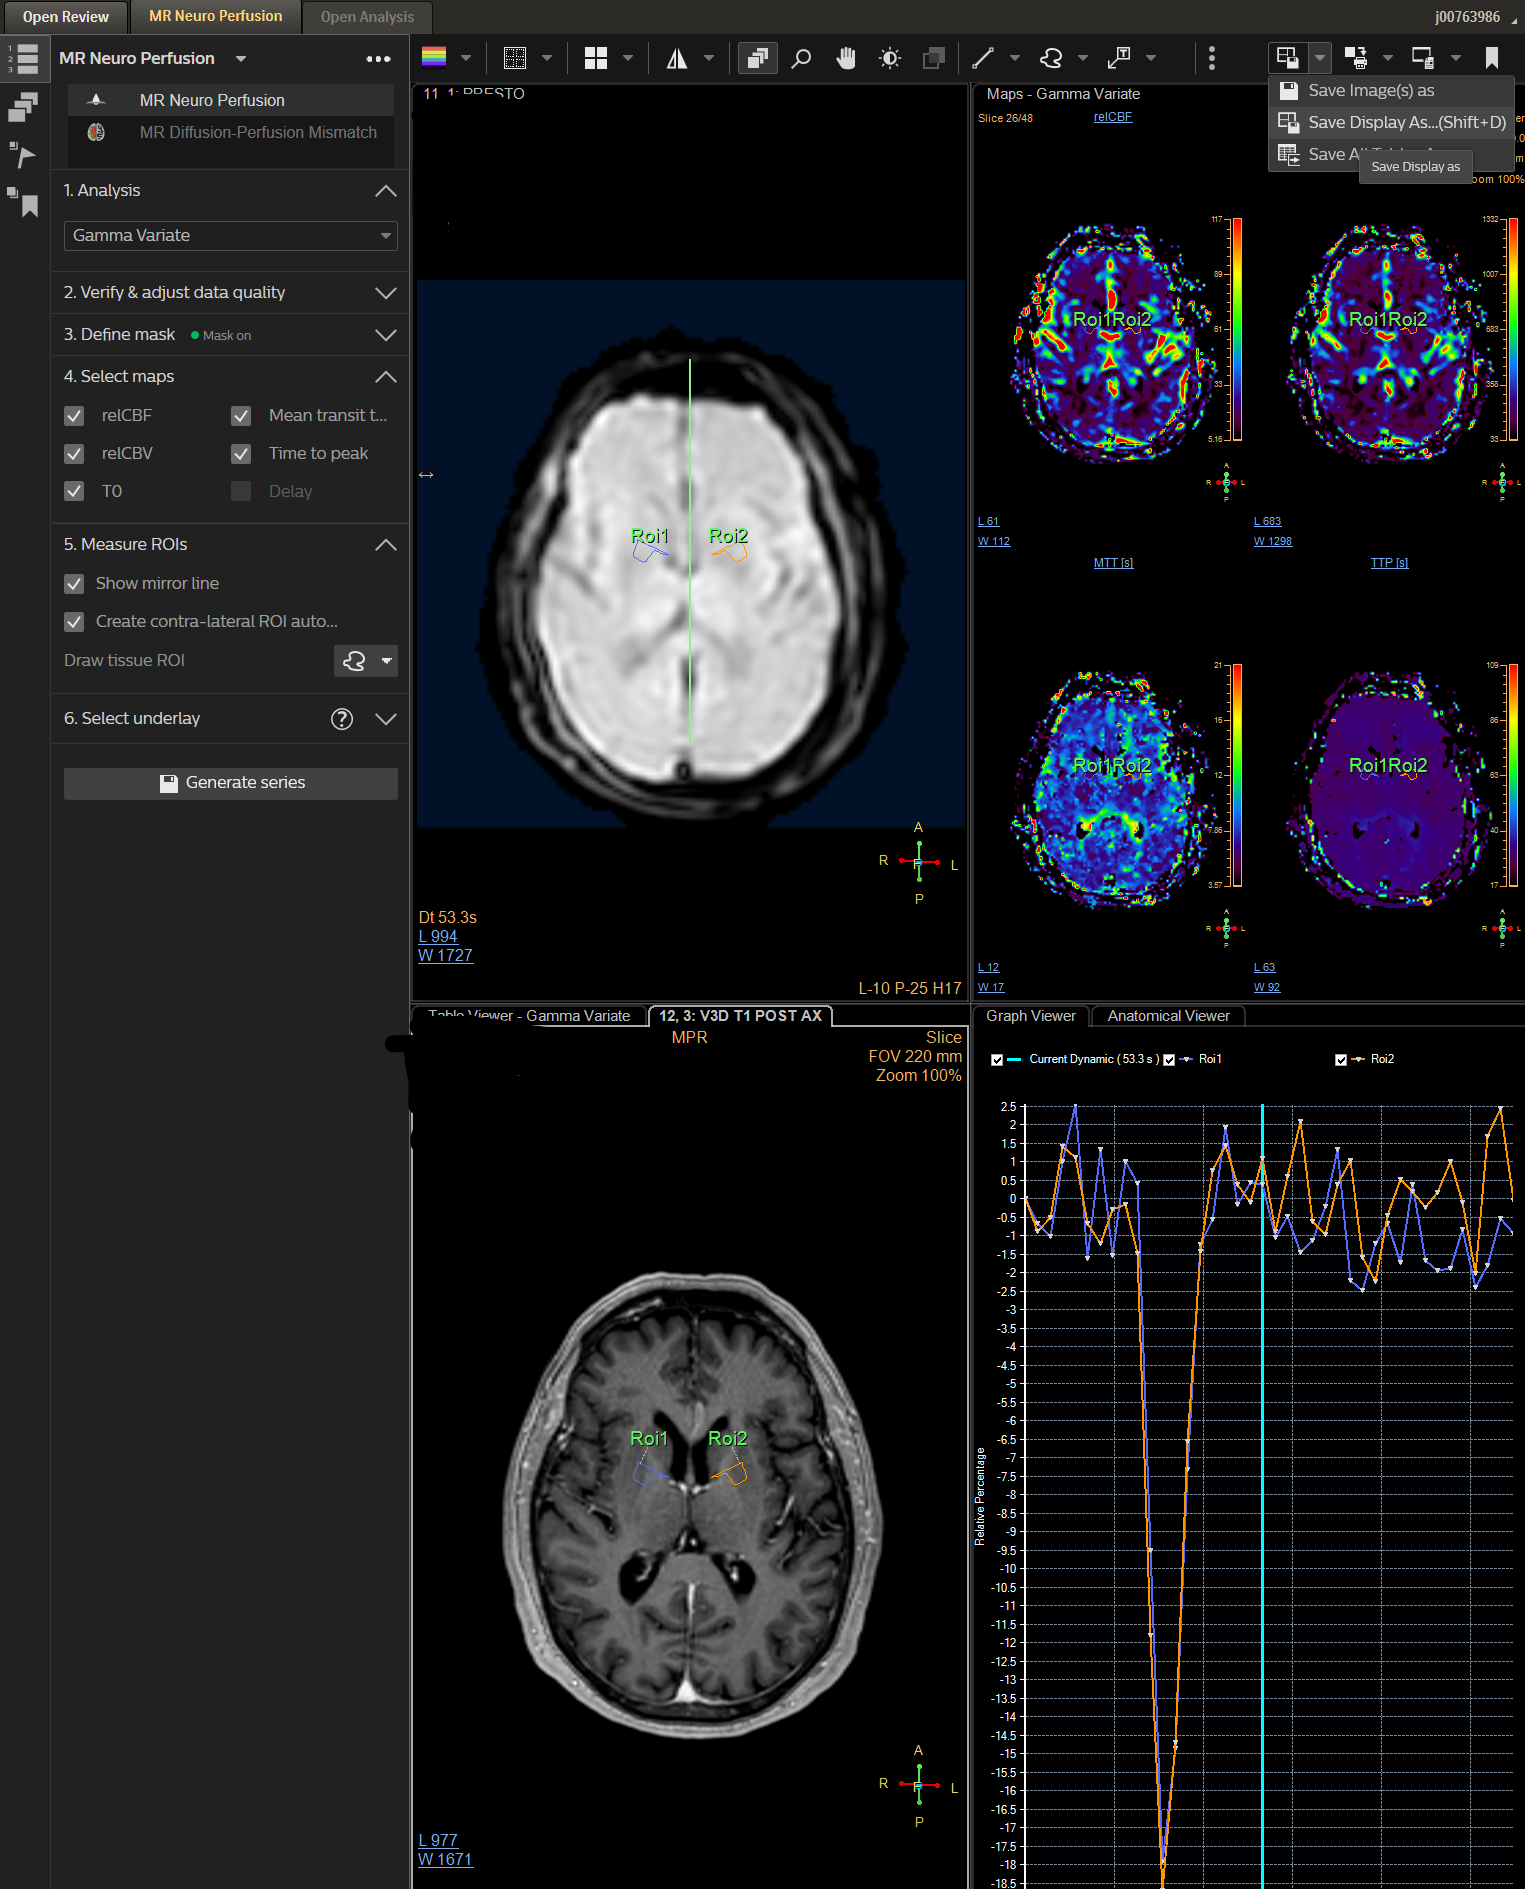
Click the save disc in the top right and click save display.
References:

Click the two that say Philips PACS and save. You are now done.
PART 2
Now read the brain like you would read any other MR brain
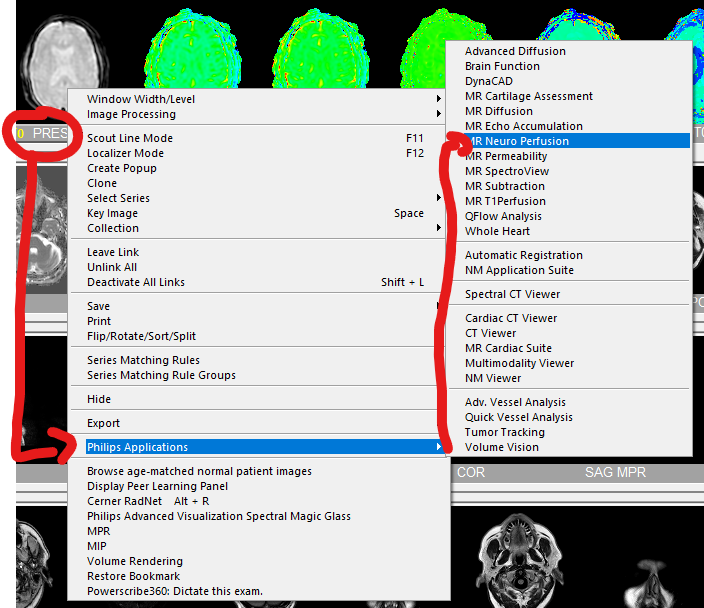
Right click on the sequence that says PRESTO —> Philips applications —> Neuro MR Perfusion
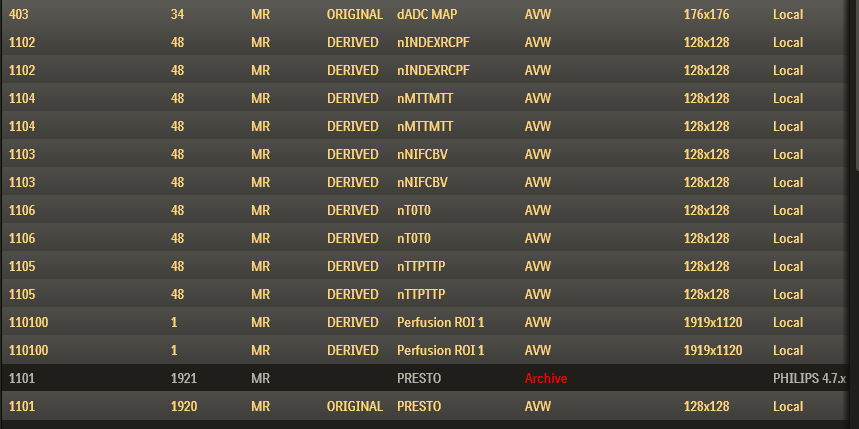
Now you need to click what studies you want imported —→ I check the 3D-T1-Post axial (this is really the only one you need), but i have found that AVW is tempermental so I also include all of the studies that are associated with the colored images so the presto, CBV, NTT, etc
Note - for these you want the original ones, NOT the ones that say archive, idk what those are
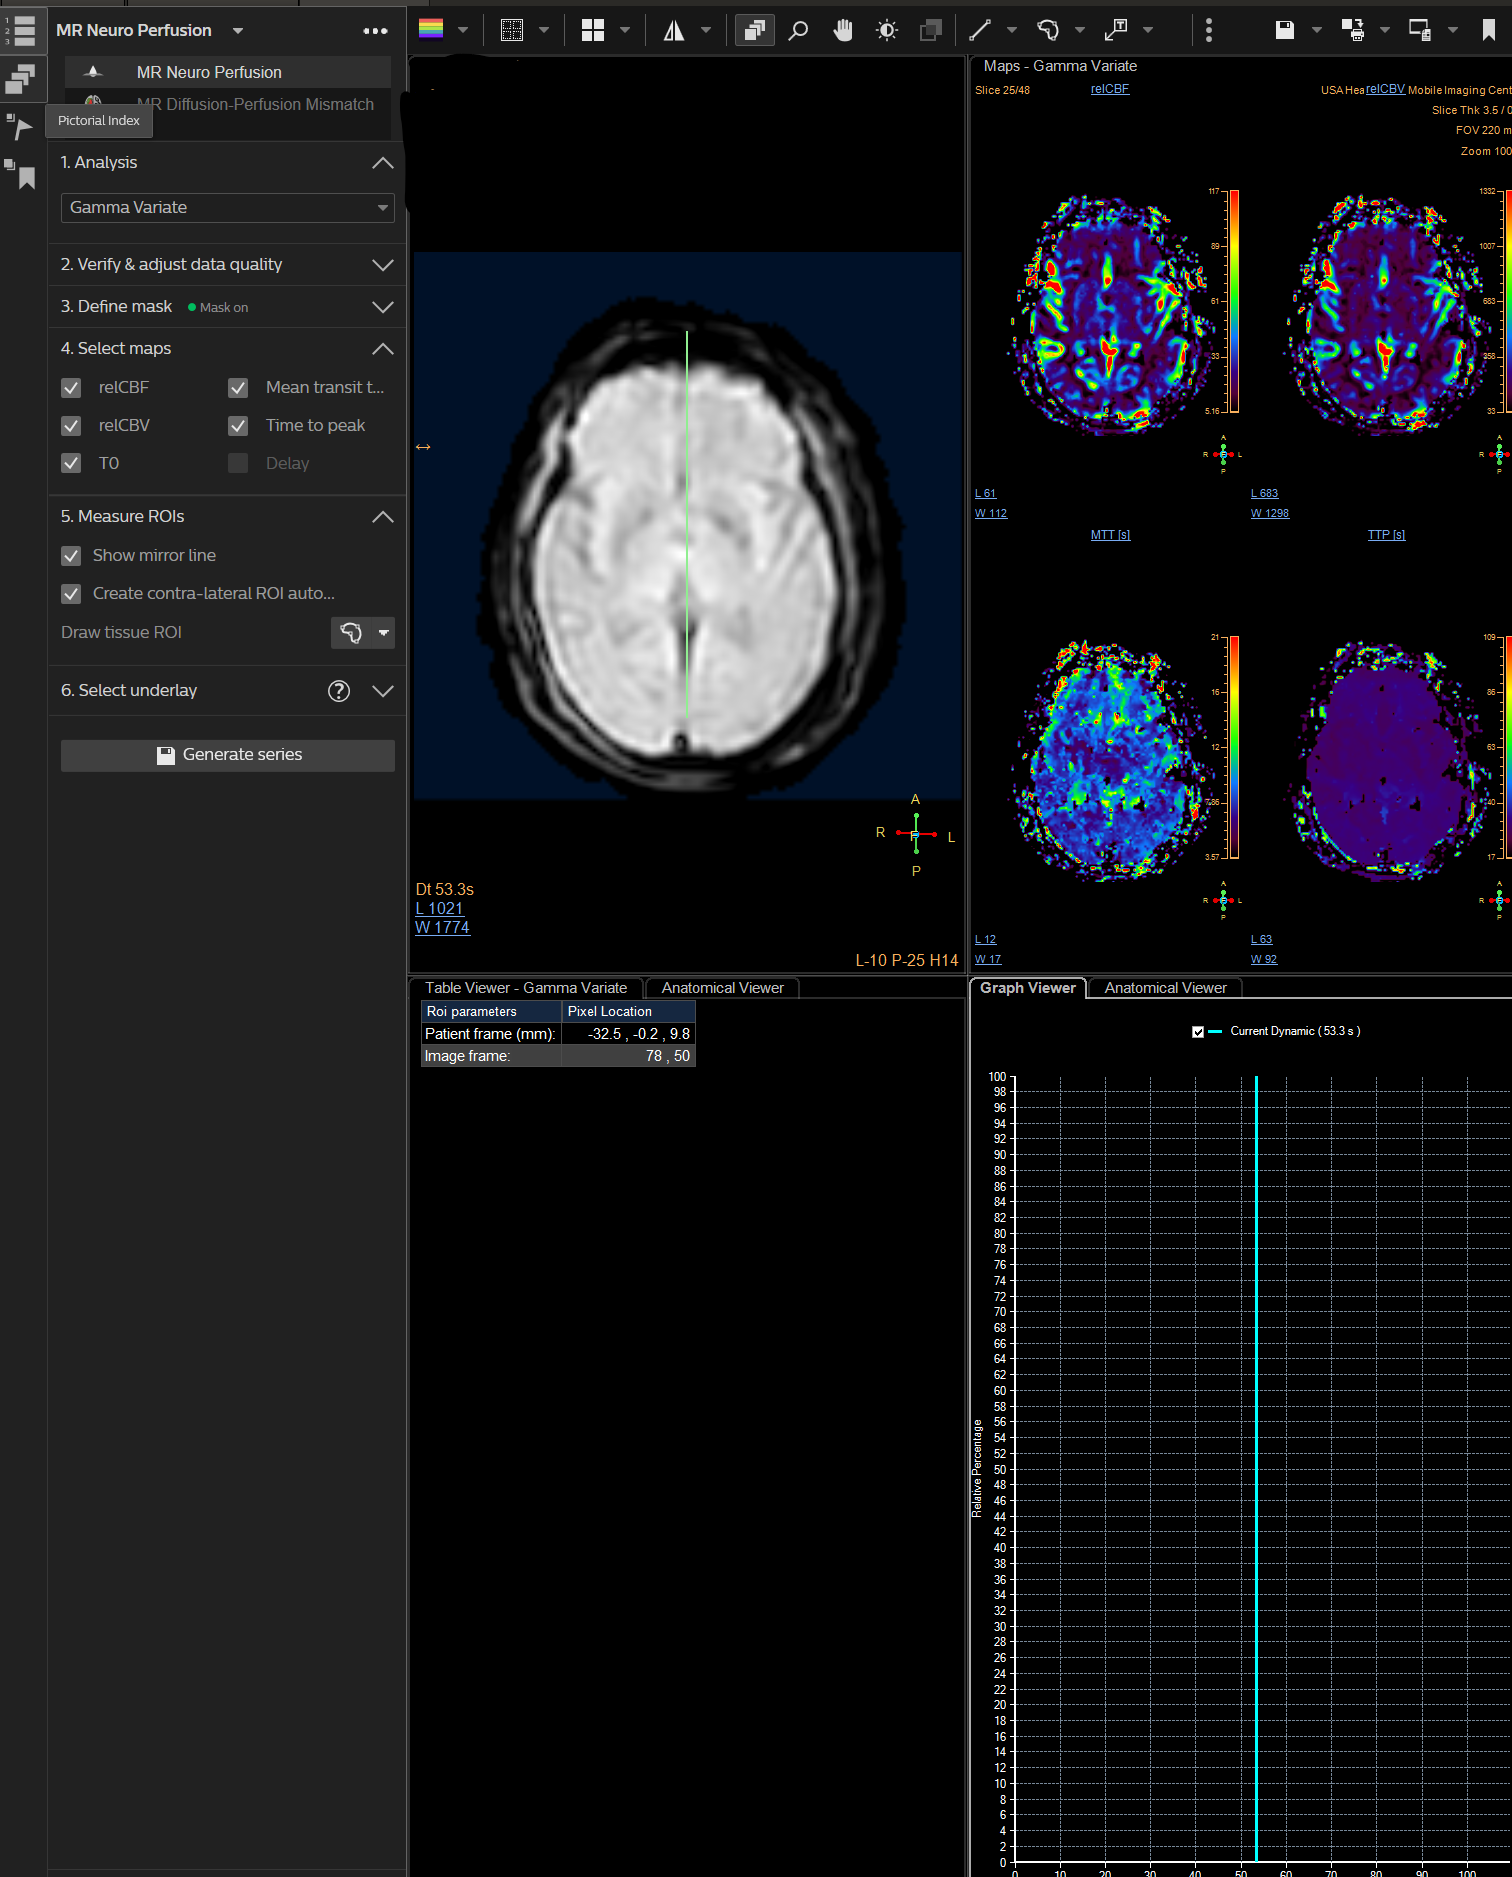
Now when you open the Philips your screen will look like this with the PRESTO loaded in the top left, but you want to use the 3D T1 Post to place the voxel so you need to do the following.
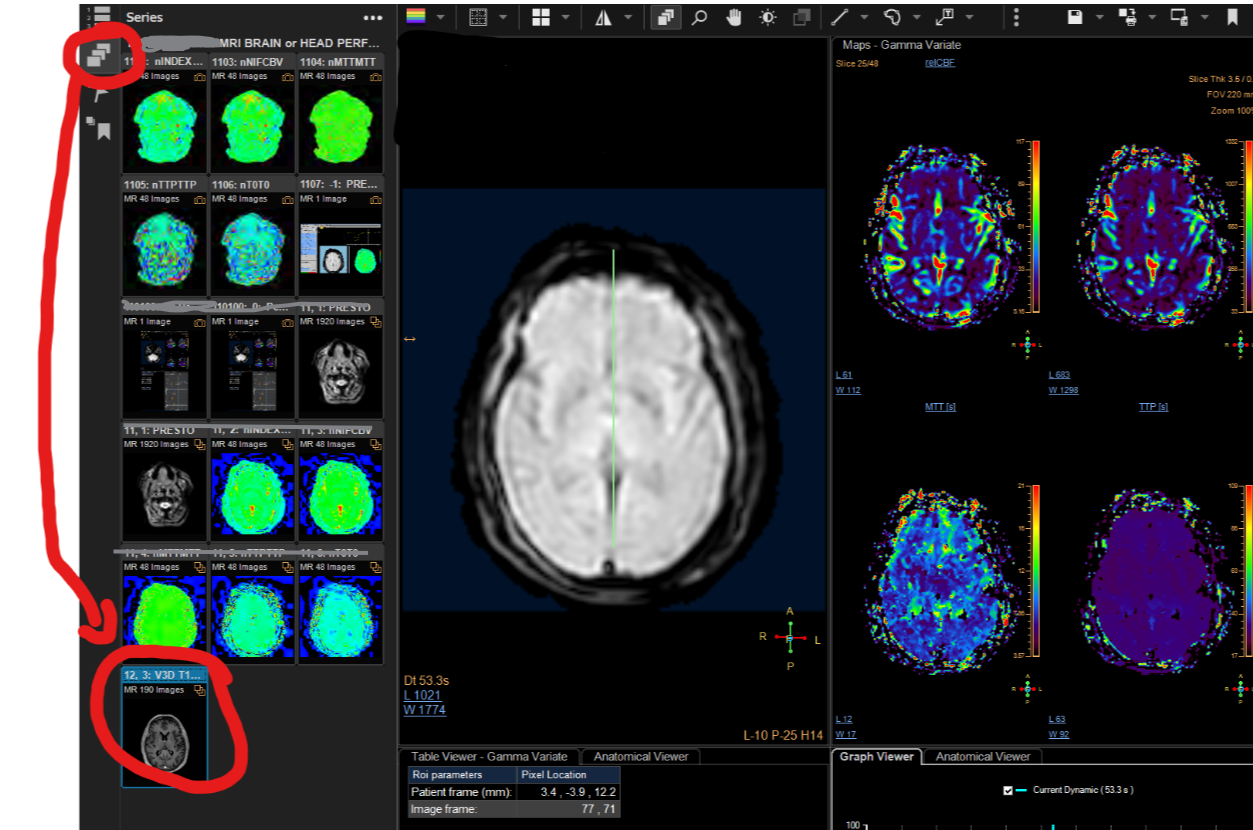
In the top left click the 3 boxes overlaying each other . Then find the 3D T1 Post and drag it to the bottom left corner. You can now place the voxel.
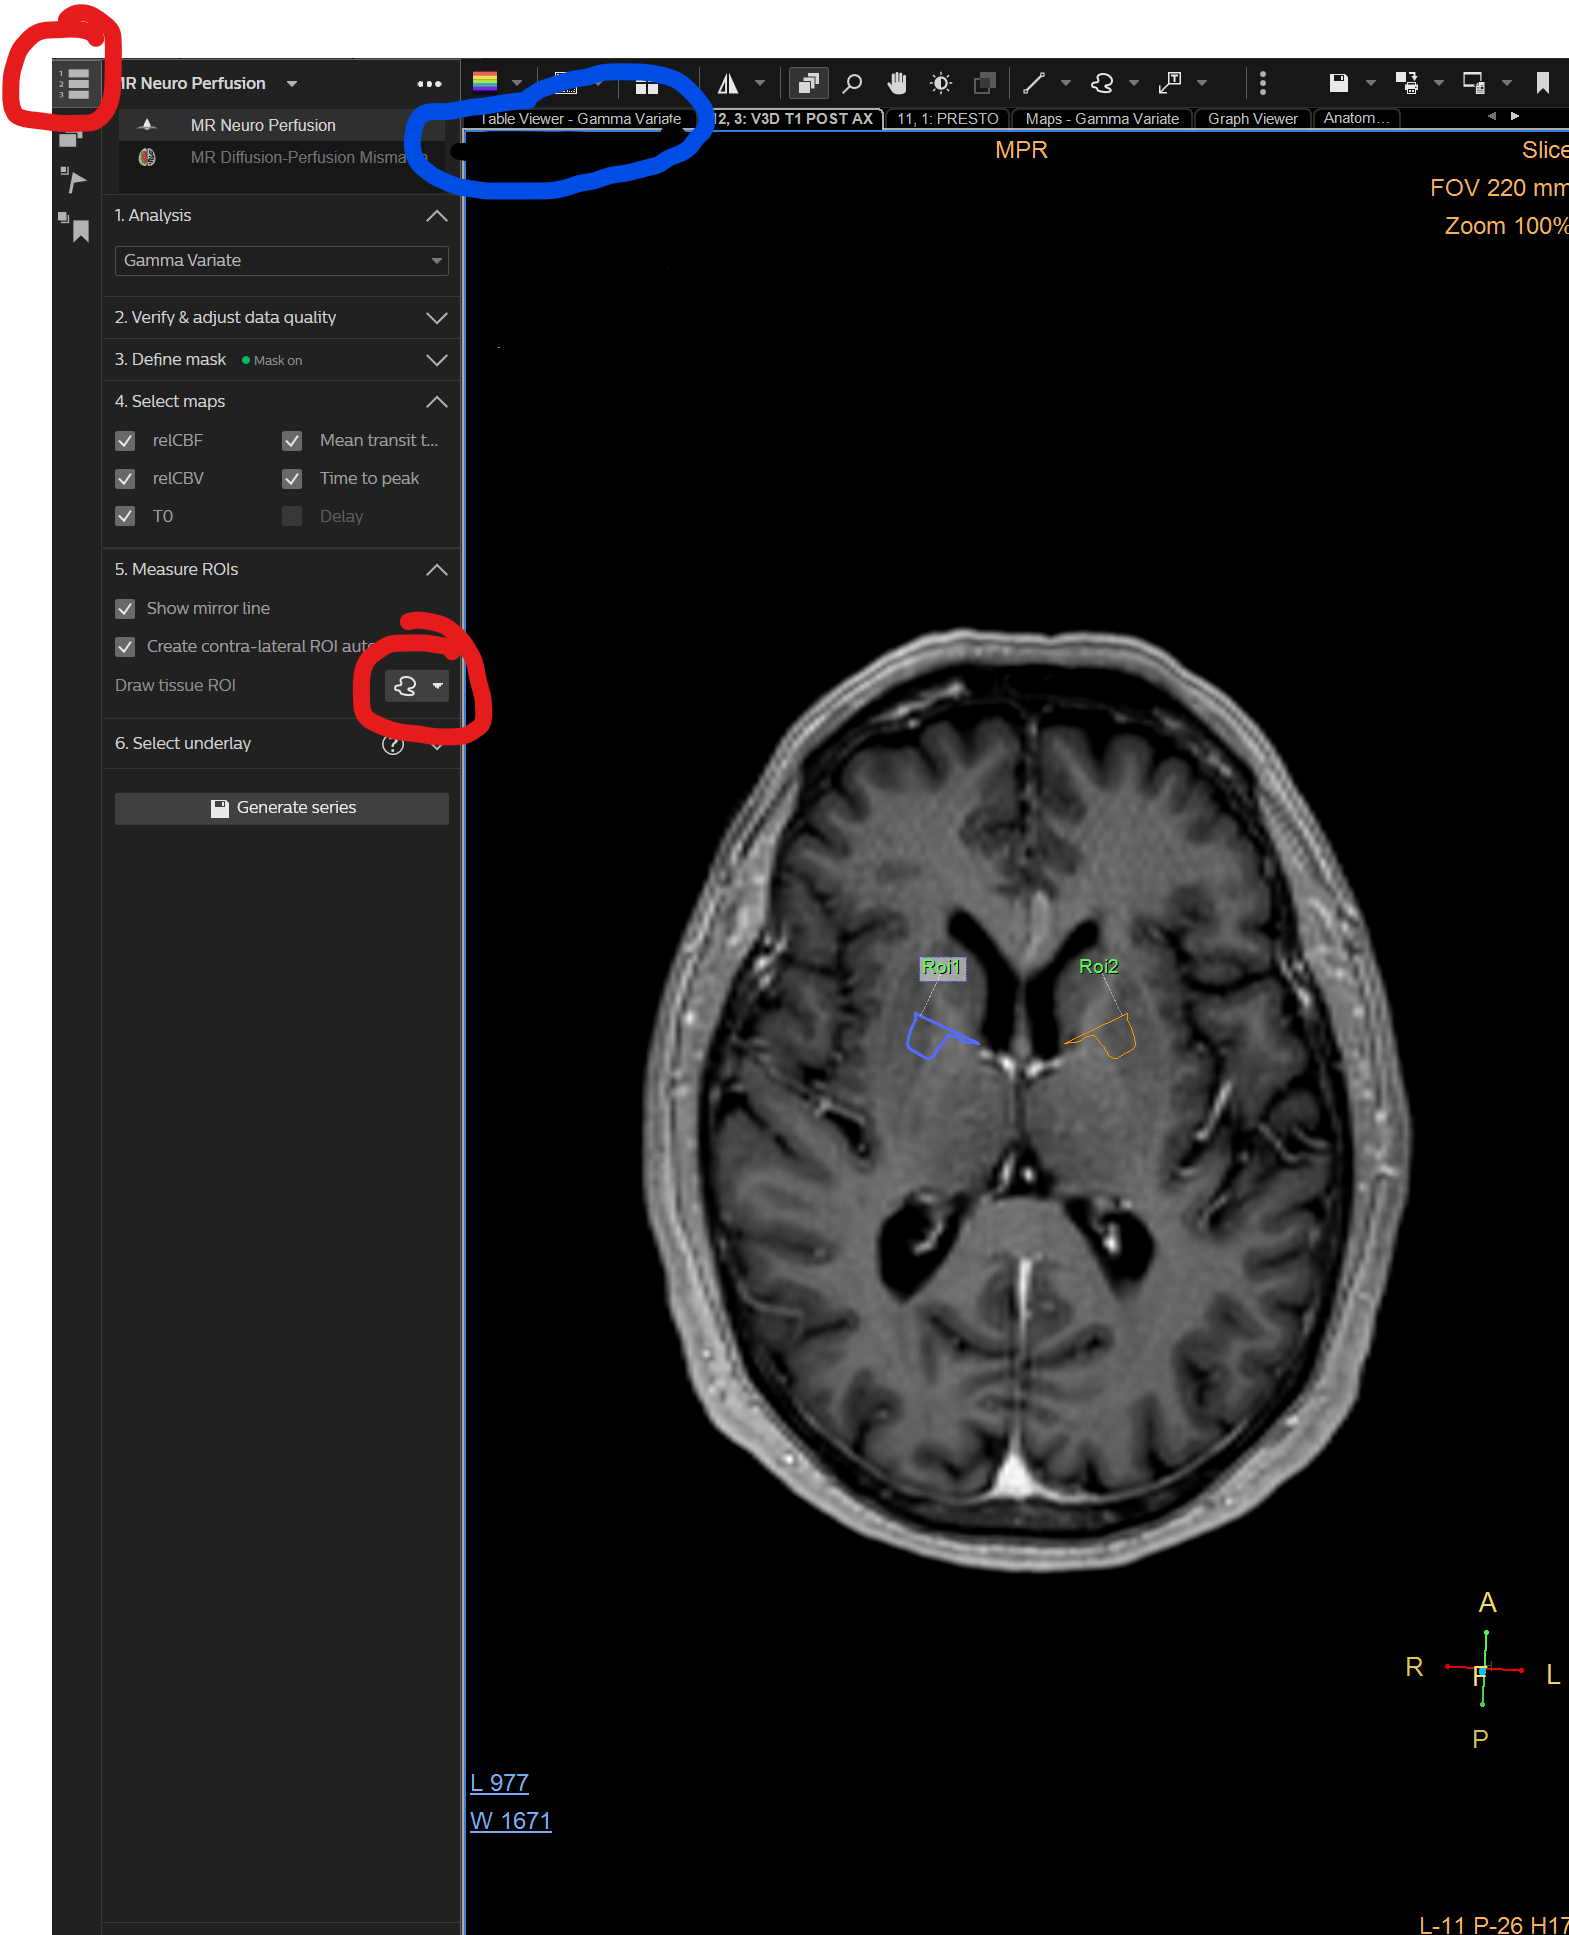
Click the 3 boxes in the top left (circled in red) to get back to the menu. Now click the dropdown arrow (also circled in red) in order to place your voxel. It does not matter which method you pick from the dropdown. Then click on the area of interest on the MR of the brain to drop the voxel. It will automatically populate a control on the opposite side.
Click the tab circled in blue to see the CVF, and other parameters for your voxel. You should exit to the 4 square view shown on prior images for the last step.